Ok, So it’s been a little longer than I intended, but here is part 2 of this series.
Digitizing Vinyl: Part 1 (and Part 1-A)
Digitizing Vinyl: Part 3
This part of the series will cover chopping the individual music cuts out of the long album sides. Here goes:
Step 11. (picking up where we left off in part 1)
Find the beginning of the first beat of music at the beginning of the record side and then click just before the music starts.

Step 12.
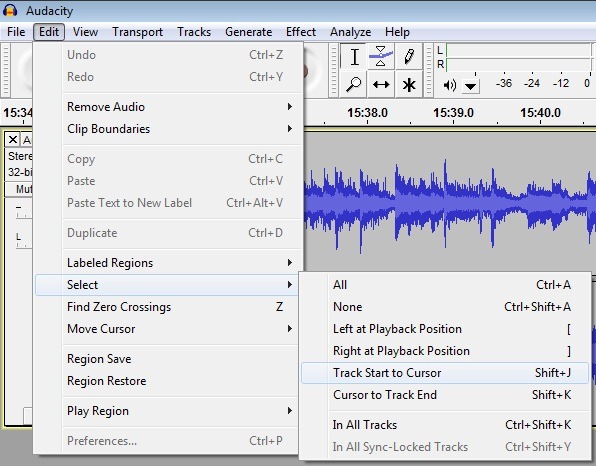
Click the “Edit” menu, then “Select” and click “Track Start to Cursor”.
Step 13.
Hit the “Delete” key on your keyboard. You’re deleting the leader up to the point where your cursor is, so make sure you really put the cursor before the music starts.
Step 14.
Find the end of the first song and put your cursor at the end of it where you want the first mp3 file to end.
Step 15.
Click the “Edit” menu, then “Select” and click “Track Start to Cursor” and then CTRL+X to cut the song out of the file onto the Windows Clipboard.
Step 16.
Select “File” and then “New” to Open a second copy of Audacity and hit CTRL+V to paste the first song into the new copy of Audacity.
Step 17.
This step is not required, I do it in case I need to tinker with the audacity file if I don’t like the way the mp3 turns out. Save the file as “Track01” in audacity’s native format “.aup”.
Step 18.
Click the “File” menu, Select “Export”.
Step 19.
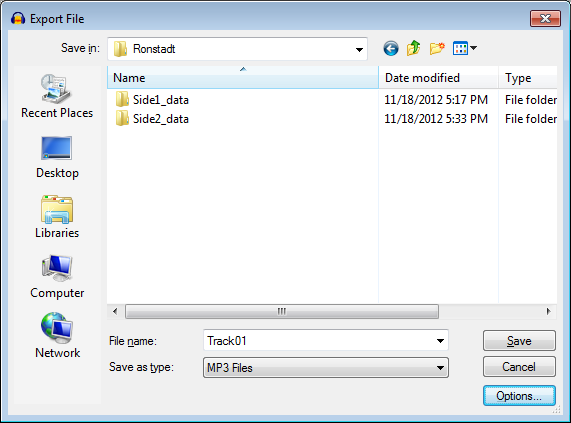
This window pops up:
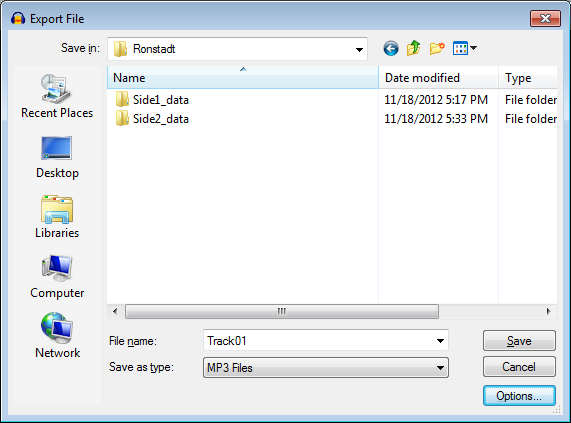
Click the Options Button.
Step 20.
This screen pops up:
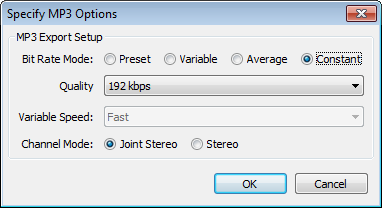
On the “Specify MP3 Options” screen, select the options you want to use to encode the mp3 file. I like constant bit rate, 192 kbps and “Joint Stereo, then click the OK button.
Step 21.
You’re back on the previous screen. Name the file “Track01” and click the save button.
Step 22.
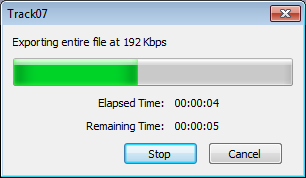
Select OK from the window that pops up, don’t worry about adding tags to the file just yet. We’re going to do them later in part 3 with MP3TAG.
Step 23.
Repeat Steps 11 – 22 for each cut on the album (both sides) except make sure you name them sequentially. Side 2 track 1 would be “Track06” if there are 5 songs on side 1 of the record…
When you’re done, you’ll have the same number of MP3 files named Track01.mp3 through Track10.mp3 (or however many songs are on the album).
This is the end of cutting the file into individual songs and exporting them to mp3. In Part 3, we’ll tag them and add album art to the files.